Saturday, December 19, 2009

Trimming of Adenium

Since joining the Adenium Yahoo Group, I have learnt some tips on Adenium maintenance. One of them is why trimming of Adenium is required.

If you want to have your Adenium growing many blooms then you need to trim its stems and let the stems grow more stems and the trimming continues with time, your Adenium will have more branches. With feeding of fertilizers on a regular basis (Adeniums need heavy & regular feeding of fertilizer in order to bloom), blooms will appear on these branches. The illustrations below (courtesy of the Adenium Yahoo Group) shows how an Adenium plant should be trimmed.


Another reason to trim the stems is when the stems have grown too long (just like the photo below). You may have seen many of such Adenium. Usually Adenium that looks nice are those with thick stem. In order to get those thick stems, you need to trim the long ones. Thus nutrients will be provided to the remaining stems and over time, they will thicken up ~ just like the Adenium in the garden of my friend, Rox.

My Adenium with messy, long stems. It's time to trim!

A photo of Adenium from Rox's garden.

The next 3 photos show the Adenium that I have newly trimmed.

New shoots appearing.


I left stems with seed pods untrimmed.
The stems are hanging backwards due to the weight of the seed pods.

Thursday, December 10, 2009

Green Plants

In this blog, I have often featured my flowering plants and totally neglected my green leafy plants. After going through the plants in my garden thoroughly, I realized that I have quite a number of beautiful leafy plants.


Wild fern
I have this wild fern growing in various cool dim corners of my garden. I don't pull them out as I feel they add a touch of the forest feel to my garden. This kind of fern is commonly seen when I go jungle trekking. Based on its habit, I assume it likes damn, shady environment to grow well.


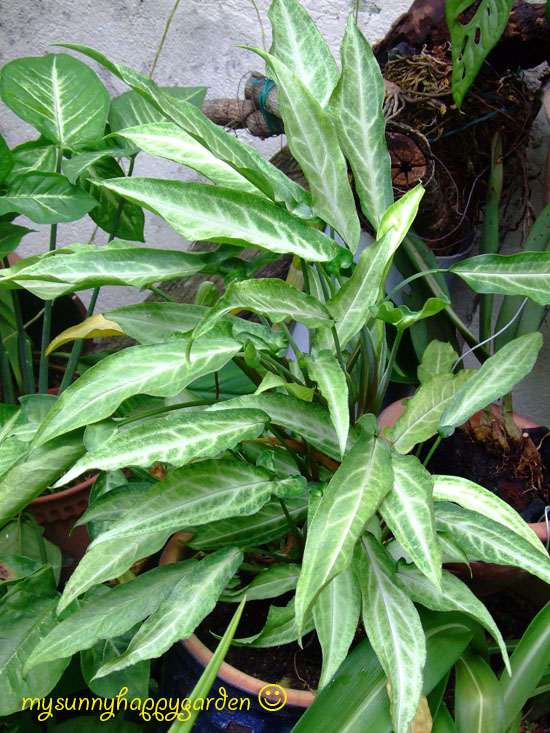
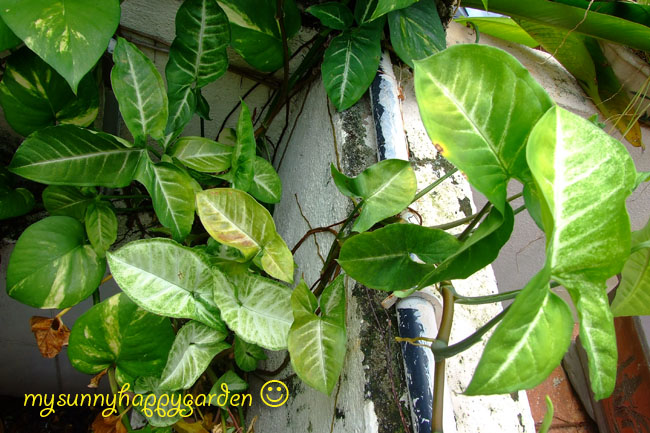
Above 2 photos: Species: Syngonium podophyllum/Nephthytis triphylla. Family: Araceae
Nickname: Goose foot
I think the above are 2 different species of the Syngonium plants. The top one has a narrower, longish leaves than the second photo. This is a creeper plant as you can see in the second photo that it has creeped over the wall. It is very easy to maintain and propagate. They grow healthily under the shades of my bigger plants. This photo was taken during rainy season and you can see that its leaves are green and lush. If planted under the hot, scorching sun, the leaves would turn into an unhealthy yellowish tone. To propagate, jus cut the stem place it in some water till it roots. Then transfer the stem into a medium that has good drainage and rich with organic matters.


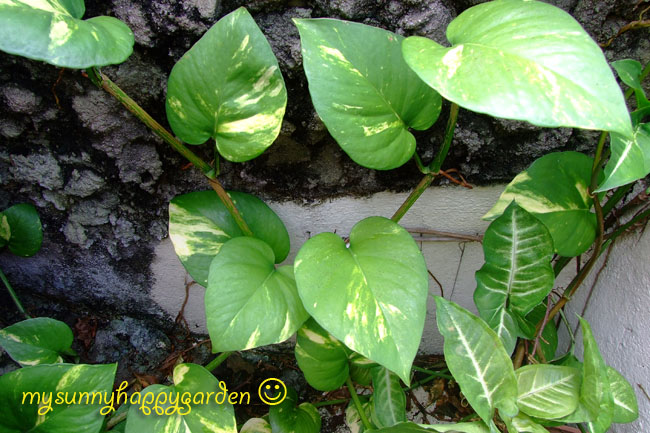
Species: Scindapsus aureus/ Apipremnum aureum. Family: Araceae.
Nickname: Devil's Ivy or Money Plant. Locally called: Sireh Puteri.
This is a very common plant that can be found in many gardens in Malaysia. The heart shaped leaves and the variegated species make this plant attractive. It can be grown on soil or water. In my garden, it is grown on soil, used as grown cover for my bougainvillaea. As a climbing plant, it has climbed over my wall and grown healthily. My Chinese friends like to keep this plant as the name, Money Plant, is believed to bring one prosperity.


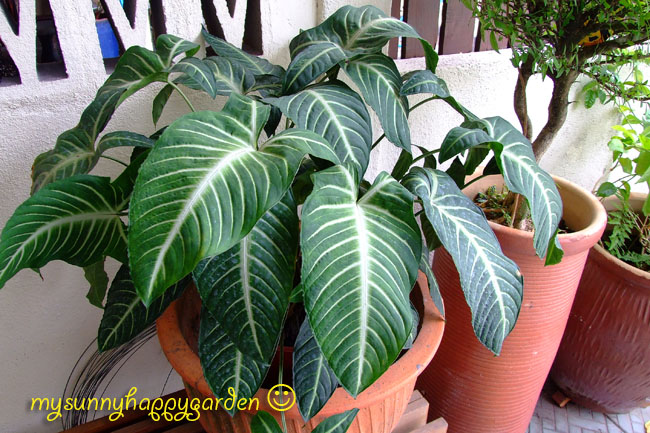
Xanthosoma sp. from the Araceae family. Locally called 'Keladi Belang'.
This plant grows well under the shade of my porch. The plant was bought from a nursery in Tangkak in April this year at RM16. To me, that is pricey but I love the attractive white patterns on its velvety dark green leaves. I have re-potted the original plant that I bought into this big pot and it is still growing well. This plant needs moist soil. The medium used are burnt soil and coco peat. On sunny days, this plant needs to be watered twice a day otherwise the leaves would droop. Too hot a day will scorch the edge of the leaves. So I will try to keep it under my porch as much as possible. Occasionally I will feed it with goat dung fertilizer.


Dumb Cane (Dieffenbachia).
I have 3 pots of Dumb Canes. They are growing very slowly yet beautifully. Probably I didn't feed them with fertilizers regularly. I like the glossy sheen on that new leaf in this photo.


I don't know the name of the 2 plants above. If any of you know them, I appreciate it if you can share your knowledge with me. Thanks ahead.


Tuesday, December 8, 2009

Lady Fingers - From Seeds to Seedlings

Recently I have collected some lady fingers seeds from the plants that I grew. To collect those seeds, I let my lady fingers aged and dried up on the plant. When it's totally wrinkled and the pod almost burst, I would cut down the lady finger. I sowed some seeds that I harvested and within a week, I had seedlings peeking out from the ground.


Healthy seedlings grown from the above seeds.

Yesterday evening it rained heavily and this is what happened to my young seedlings! I hope it would survive the daily heavy downpour. I plan to re-pot it when the stem is a little bit thicker. For those of you who have tried planting lady finger, how soon do you re-pot your lady finger seedlings? Can you share your experience with me?


Wednesday, December 2, 2009

Gardenia Pfordii - Blooming Madly

My Gardenia Pfordii plant is producing so many blooms! I am so delighted to see it blooming profusely or madly. My garden is filled with its fragrant. I wish I can pack the fragrant and attach it in this posting so that visitors can have a whiff of its sweet-smelling fragrant.

The new bloom which is white in colour will usually appear at night. The next morning, this white bloom will turn into light yellow. The following day it will turn darker yellow before it drops off from the plant.

How do I get it blooming like this? I am not sure actually. I only remember putting some blooming fertilizer on the plant two weeks ago.

You can see flowers in 3 different colours in these 2 photos
~ white, light yellow & darker yellow.


LinkWithin

Related Posts Widget for Blogs by LinkWithin
Custom Search